Lab 6: The Internet of Things and Serial Peripheral Interface
Introduction
In this lab, I desined and built a simple IoT device. I interfaced with a temperature senesor module over an SPI link and interfaced the MCU with an ESP8266 module over a UART link. Ultimately, there was an HTML page that could control an LED and display the temperature read from the temperature sensor according to the bit resolution set by the user.
Design and Testing Methodology
Design Methodology
This design interfaced with a temperature sensor module over an SPI link. The SPI functionality of the MCU was implemented in C using CMSIS device templates.
Additionally, the MCU interfaced with an ESP8266 module via a UART link in order to host a webpage. On this webpage, the user can toggle an LED on and off. The user can also select the bit resolution (8-12 bits) at which the temperature is being read/displayed on the webpage.
Testing Methodology
Testing this design was done via hardware verification. First, I made a simple script that transmitted a very simple message via SPI. Then, I connected the MCU with a logic analyzer in order to verify that SPI was functioning (the decoded message displayed properly). Then, I tested the LED toggling and temperature reading by exhausting all the inputs on the webpage.
 (Figure 1: Example SPI Transaction)
Figure 1 shows an example SPI transaction from the temperature sensor.
Technical Documentation:
The source code for the project can be found in the associated GitHub repository.
Schematic
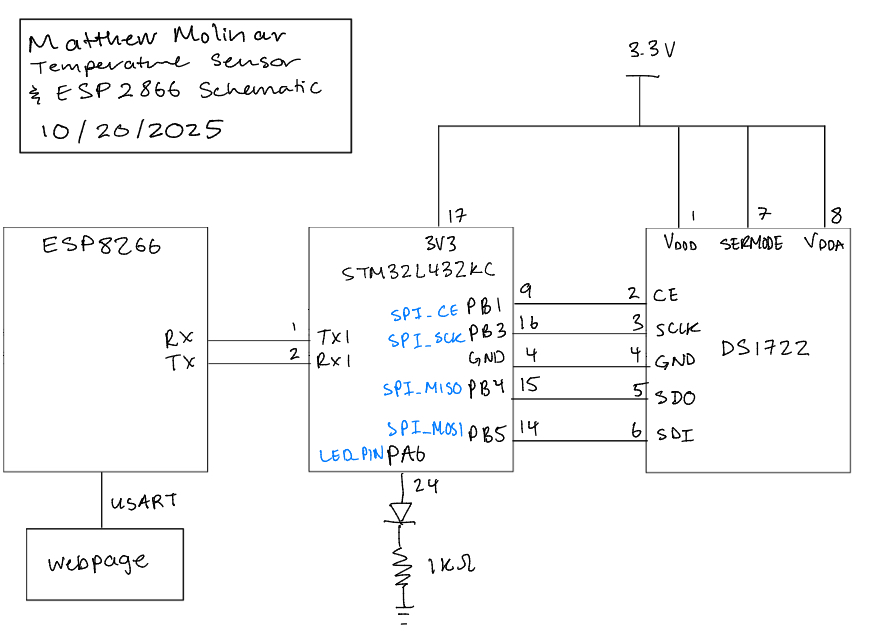 (Figure 2: Schematic of physical layout)
Figure 2 shows the physical layout of the design. The MCU was connected to a DS1722 digital temperature sensor and was connected via a SPI link. The MCU was also connected to an ESP8266 via a UART link, which hosted a webpage displayed on the monitor of the computer it was connected to.
Results and Discussion
Hardware
The LED was able to be toggled based on user inputs on the webpage. The webpage also displayed accurate temperature readings with different resolutions based on user inputs. Below is a screenshot of the working webpage.
 (Figure 3: Screenshot of Working Webpage)
Conclusion
This design sucessfully used SPI to interface with a digital temperature sensor. It also used UART to interface with an ESP8266 which hosted a webpage that allowed a user to toggle an LED and read temperatures at different resolutions. I spent a total of 17 hours on this lab. Unfortunately, I think a lot of time was spent fideling around with the logic analyzer in order to capture a SPI transaction of the temperature sensor.
AI Prototype Summary
For the following AI Prototype, I will be using ChatGPT.
Prompt 1
I’m making a web portal to interface with a temperature sensor. Create a HTML page that looks good and is intuitive to show the temperature, control an LED, and change the precision of the readout.
Prompt 1 Generated Website
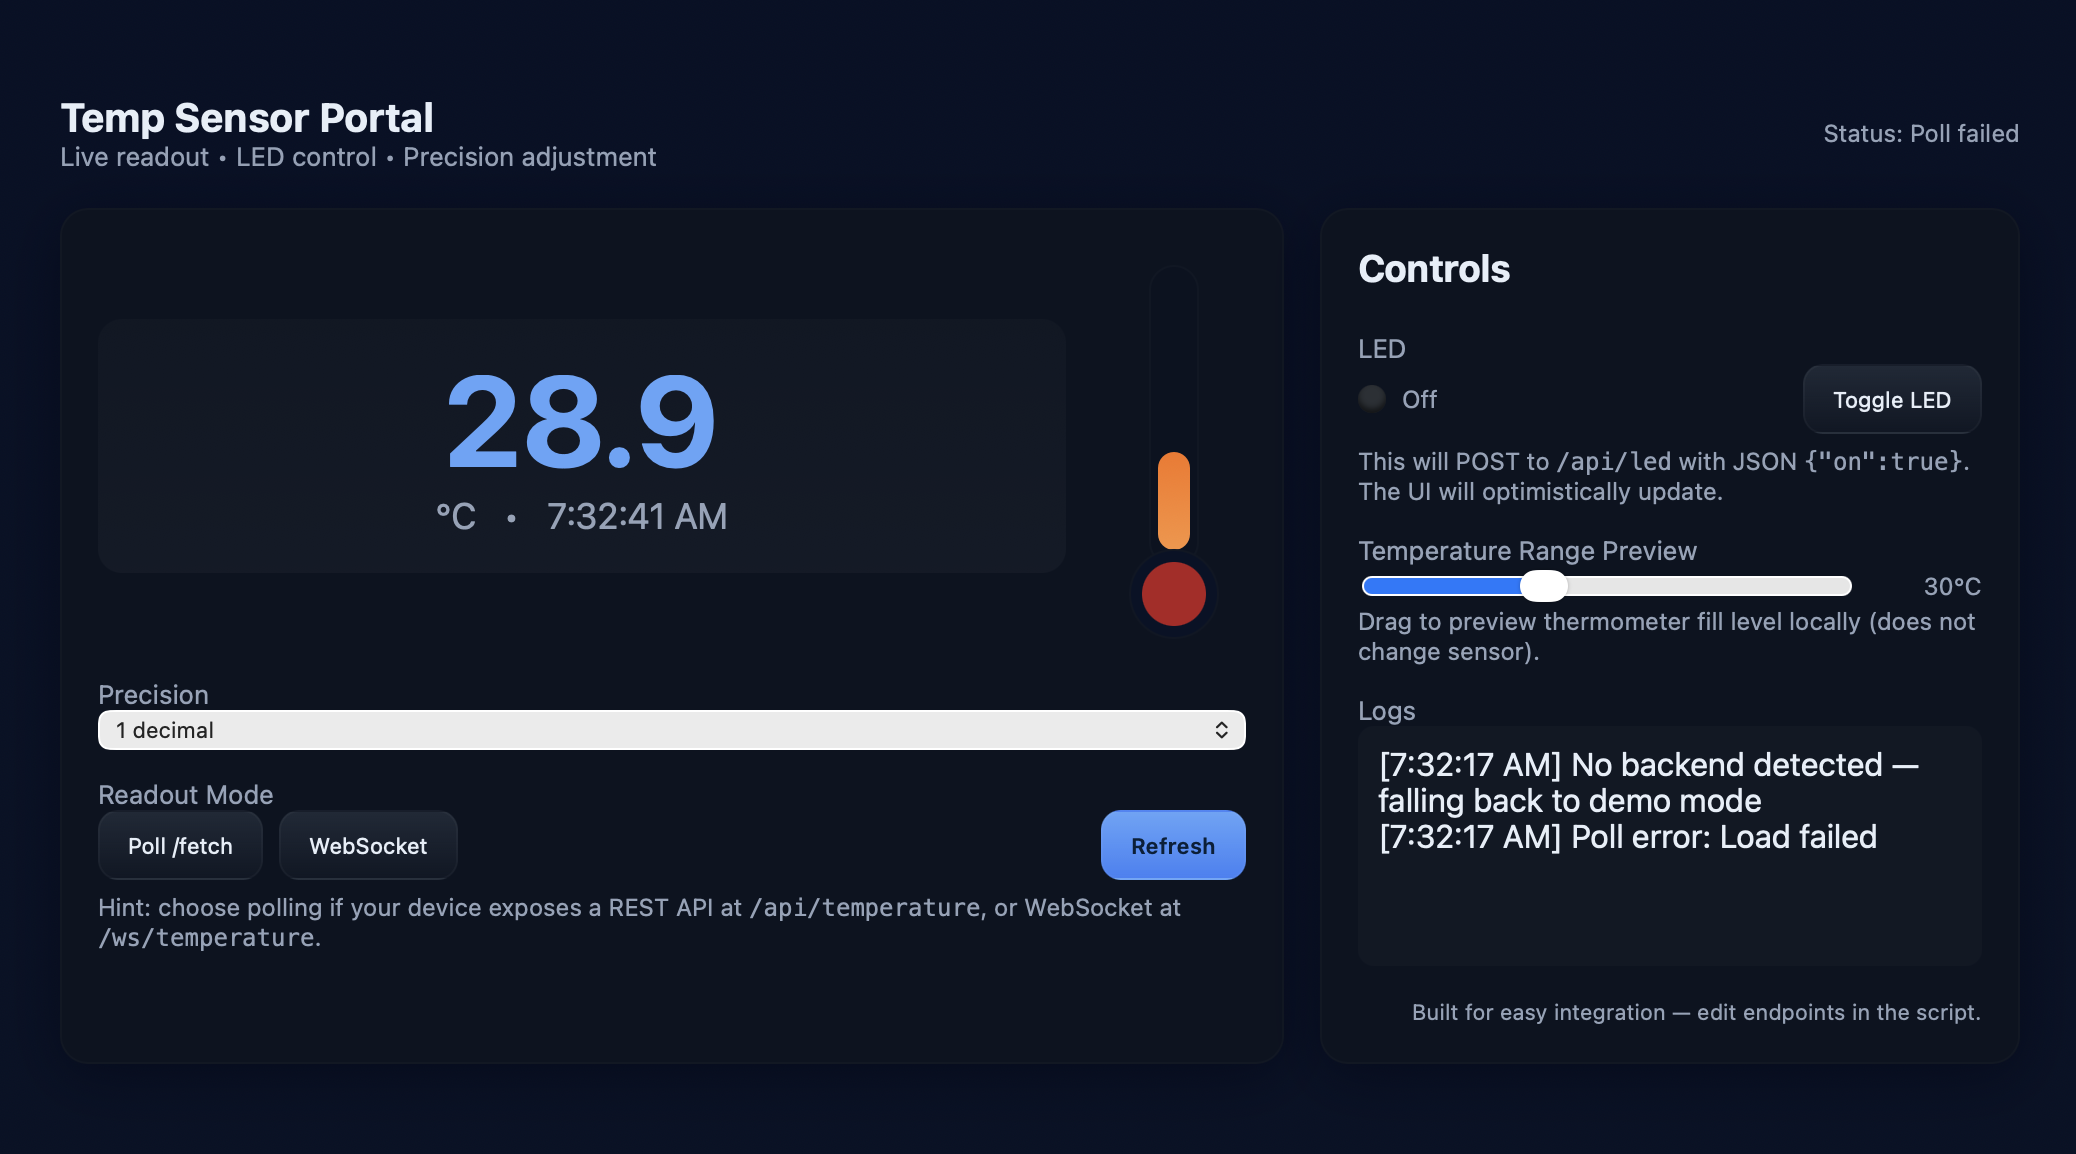 (Figure 4: Webpage created by ChatGPT)
Prompt 2
Write me a C function to carry out a SPI transaction to retrieve a temperature reading from a DS1722 sensor. Make use of CMSIS libraries for the STM32L432KC.
Generated Code
The code generated for these prompts can be found here.
Reflection
ChatGPT ended up preforming decently. The webpage that it created using the first prompt (see Figure 3) looked pretty nice, although it did not interface cleanly with the project. One major issue with the webpage is that the bit resolution was configurable starting at 1 bit. This didn’t make sense because the DS1722 has an adjustable bit resolution from 8-12 bits.
Ultimately though, I think this result was more accurate than the second prompt. I think the main issue that ChatGPT’s code failed was because SPI_CE was set to its alternate function of SPI_NSS instead of just a regular GPIO output. This would cause the DS1722 to never be selected.